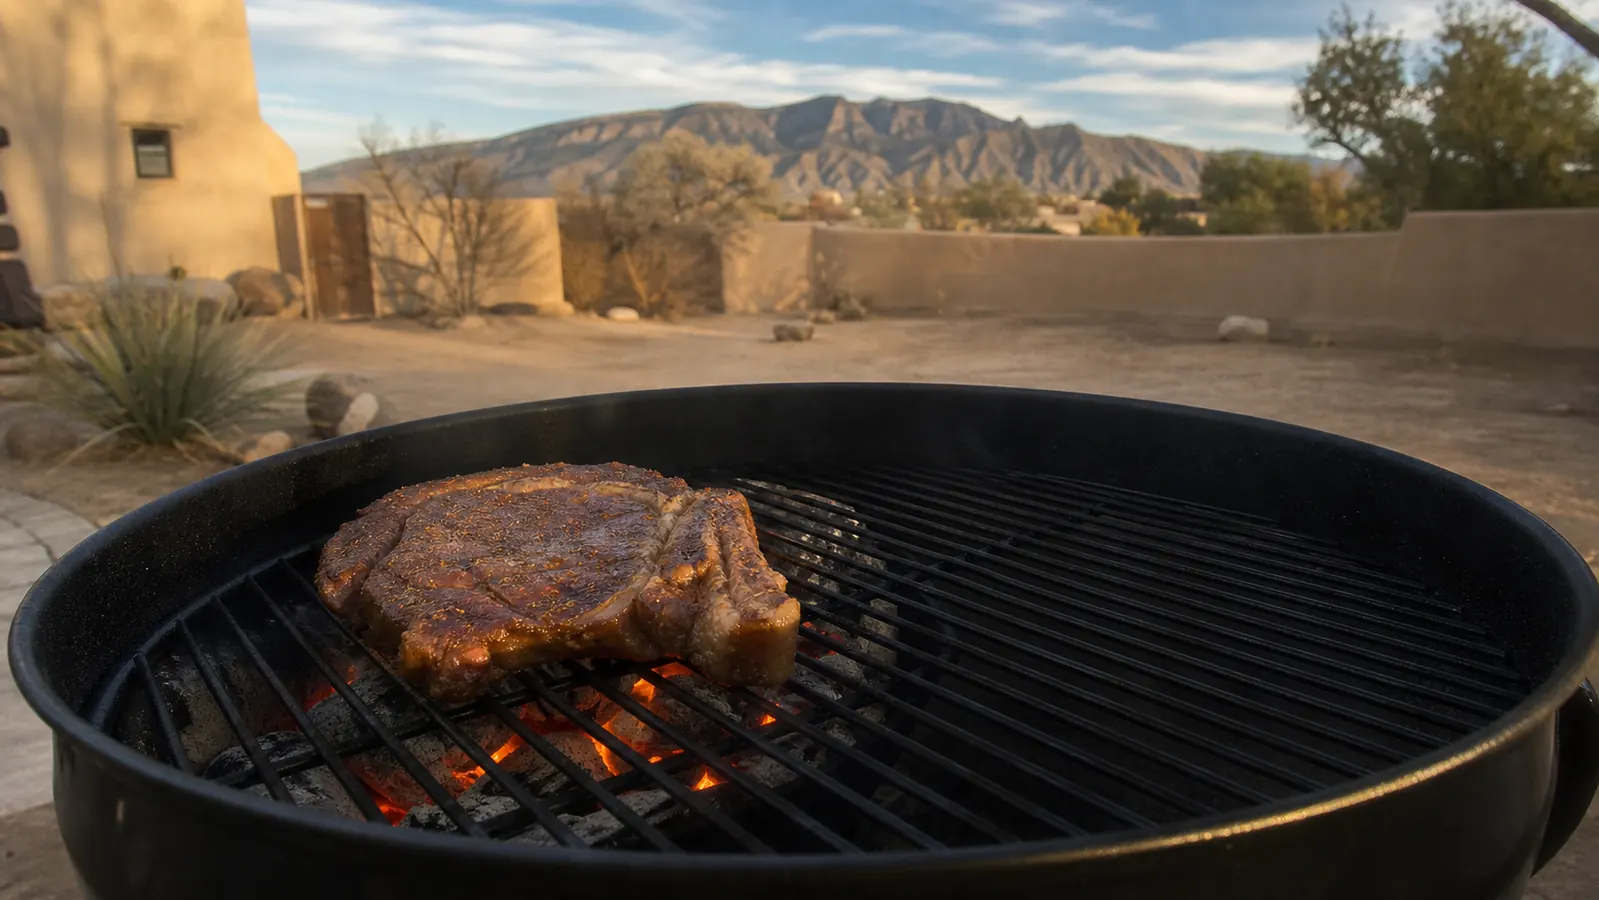
Most of the sear complaints I hear from other backyard cooks around here have nothing to do with the meat and everything to do with the fire. They're cooking on a single pile of coals spread evenly across the whole bottom of the kettle, no hot side, no cool side, and then wondering why a ribeye either scorches on the outside before the middle catches up or never builds a real crust at all. I ran into that exact problem on my Weber kettle for longer than I want to admit, until I stopped treating the fire like one zone and started treating it like two. It's a five minute change to how you load charcoal, and it fixes almost every sear complaint I hear.
I cook at 5,000 feet in Albuquerque, where the air is thin and dry enough that charcoal catches faster and burns hotter than it does back east, which sounds like it should make searing easier. It doesn't, not automatically. A hot fire spread too thin across the whole grate still won't give you the kind of hard, fast sear a good steak or a thick pork chop deserves. What follows is the exact method I use on my Weber Original Kettle to build real two-zone heat, get a crust that actually holds, and still have a cool side to pull the meat to before it overcooks. It works the same way on any 22-inch kettle. I'll flag where altitude changes the numbers along the way.
Still Getting an Uneven Sear Off a Single Pile of Coals?
Everything below assumes a real kettle grill, the kind with a bottom vent, a lid damper, and enough room to bank coals to one side. I run this exact method on the Weber Original Kettle, 22-Inch, the same grill I've cooked on for twelve seasons at altitude.
Amazon Check Today's Price on Amazon →Step 1: Build a Real Two-Zone Fire, Not an Even Bed of Coals
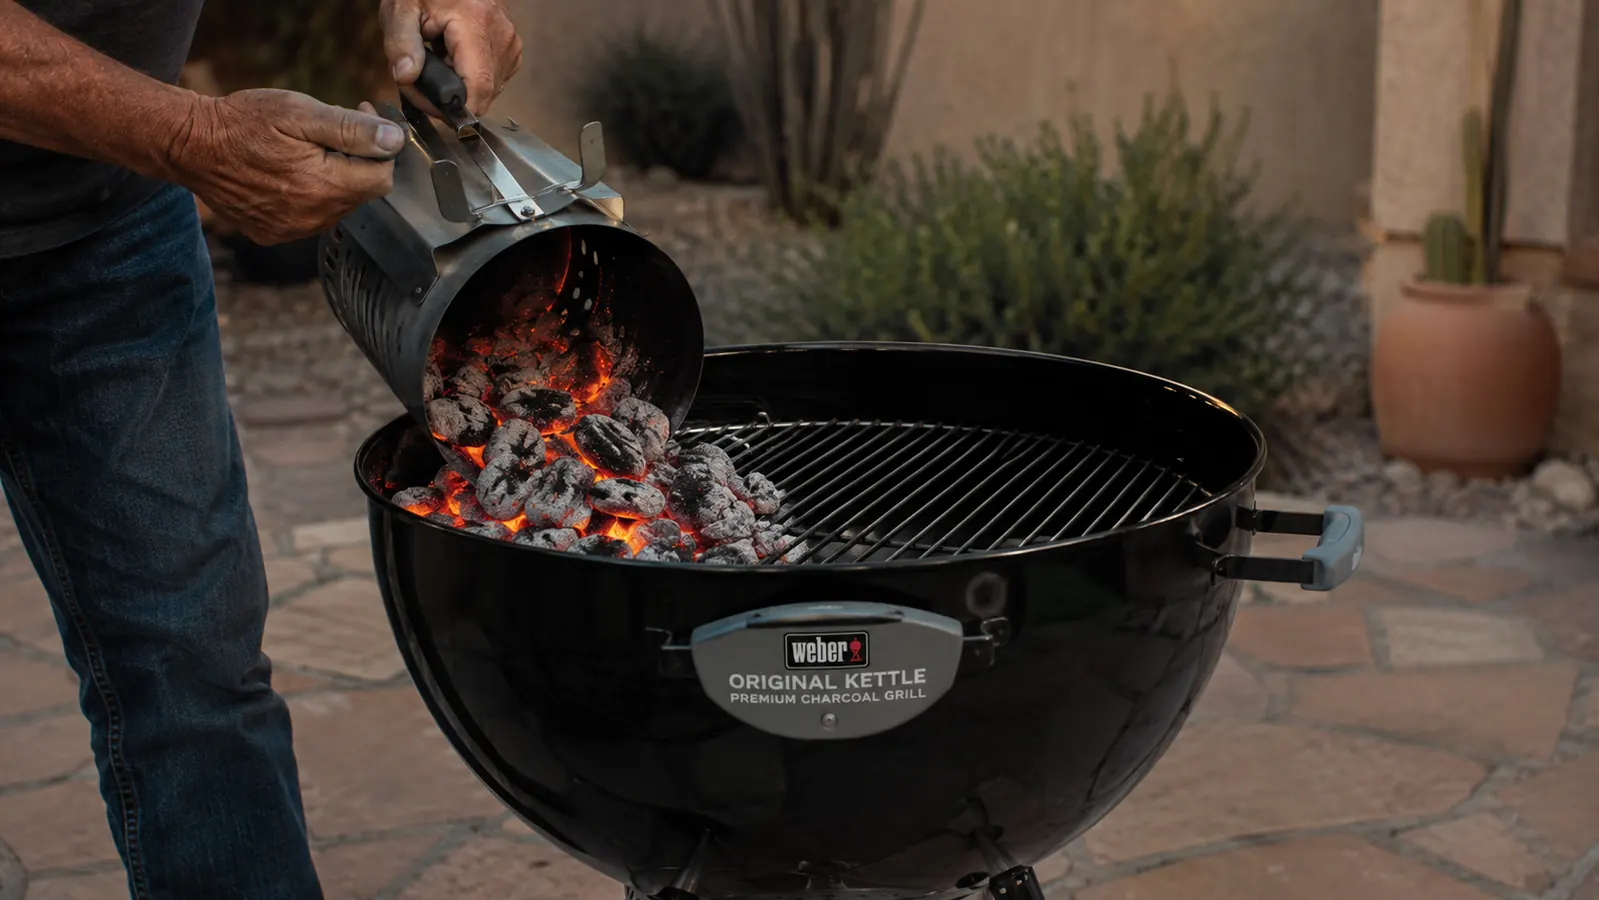
Fill a chimney starter about three-quarters full of charcoal and light it. Briquettes or lump both work here, though I lean on briquettes for a sear because they burn more evenly and hold a steadier mound than lump, which tends to shift and leave gaps as it catches. At my altitude that chimney is usually ready in about 14 minutes, coals grey and glowing on top, where the same chimney takes closer to 20 minutes at sea level because there's more oxygen moving through it down there. Whatever the timing looks like where you live, wait until the coals are genuinely grey all the way, not just glowing underneath a layer of black. A chimney dumped early gives you a weak fire that never builds real heat on the direct side, and you'll be chasing a lukewarm sear for the rest of the cook.
Once it's ready, dump the lit coals onto one half of the charcoal grate, banked into a mound rather than spread flat. Leave the other half of the grate completely empty. That empty half is your cool zone, and skipping it is the single biggest reason a home sear goes wrong. Without it, there's nowhere to move a piece of meat once the outside has caught and the inside hasn't, so you end up choosing between a raw center and a burnt crust instead of getting both a real sear and the right doneness in the same cook.
If your kettle has a hinged access panel built into the cooking grate, like the one on my Weber, position it directly over the mound of coals. That lets you add a few more briquettes mid-cook without lifting the whole grate and losing your heat. For a straight sear on steaks or chops you probably won't need to refuel, but it's a habit worth building for the nights you're searing something bigger, like a tri-tip or a stack of bone-in chops for a full table.
Step 2: Preheat and Scrape the Grate Before Anything Touches It
Put the lid on with both vents open all the way and let the grate preheat for about 10 minutes before anything touches it. A cold or half-warm grate is where most sears fail before the meat even hits the fire, since the metal itself has to be hot enough to sear on contact instead of just steaming the surface while it slowly catches up to temperature. If you want a quick check without a thermometer, hold your palm about an inch above the grate over the hot side. You should only be able to hold it there for a second or two before it's uncomfortable.
Once it's preheated, scrape the grate hard with a wire brush directly over the hot side. Old residue left from your last cook will stick to the meat and tear the crust right off when you go to flip it. Fold a paper towel into a tight pad, dip it in a high smoke point oil like avocado or grapeseed, and run it across the grate with a pair of tongs right before the meat goes down. Don't oil both the meat and the grate. Pick one, and I've had better, more consistent luck oiling the grate for a hard sear.
Step 3: Dry the Meat and Season It Ahead of Time
Pull whatever you're searing out of the fridge and pat it dry with paper towels, pressing hard enough to actually pull surface moisture off instead of just wiping it around. Any water left on the surface has to boil off before the meat can brown, and that delay is exactly what turns a sear into a steam bath. I do this twice, once when it comes out of the fridge and again right before it hits the grate if any condensation has formed while it sat out.
Salt it generously at least 45 minutes before you cook, longer if you can plan for it. I like a couple hours on the counter for a thick ribeye or a bone-in pork chop, which gives the salt time to pull moisture out, dissolve into it, and get drawn back in instead of just sitting on the surface. In our dry air out here that surface actually air-dries a little more during that wait, which helps the sear along instead of working against it. If you're short on time, even 15 minutes of salting beats none, but the texture difference between a rushed salt and a proper dry brine is real once you've tasted both back to back. I hold off on black pepper until after the sear, since pepper scorches fast over coals this hot and turns bitter instead of toasty.
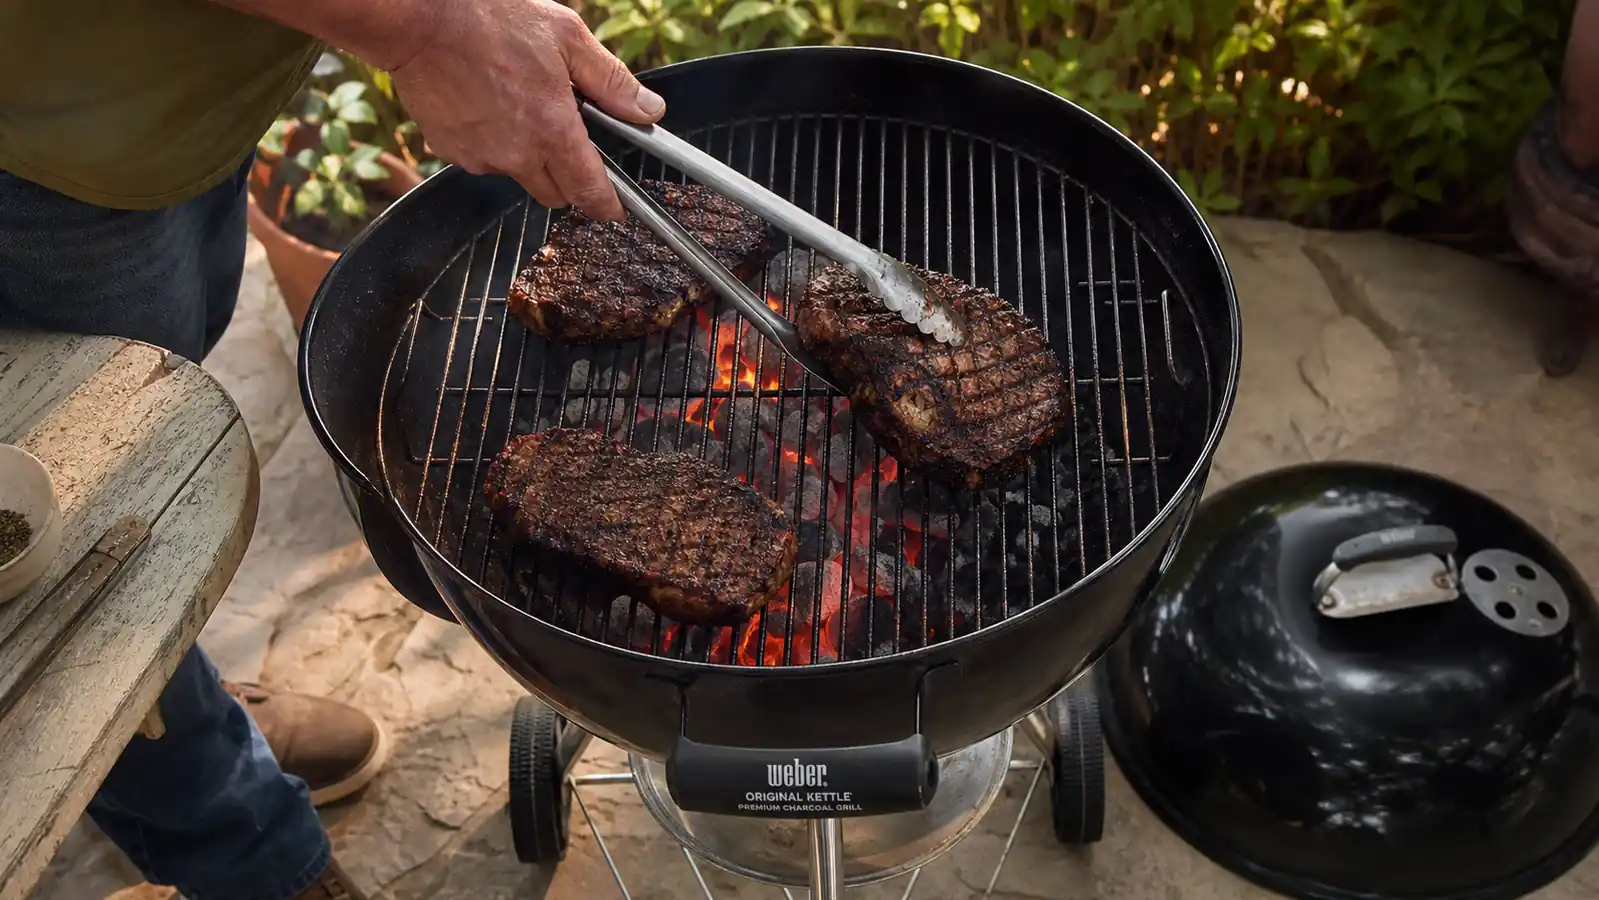
Step 4: Sear Hard Over the Direct Side With the Lid Off
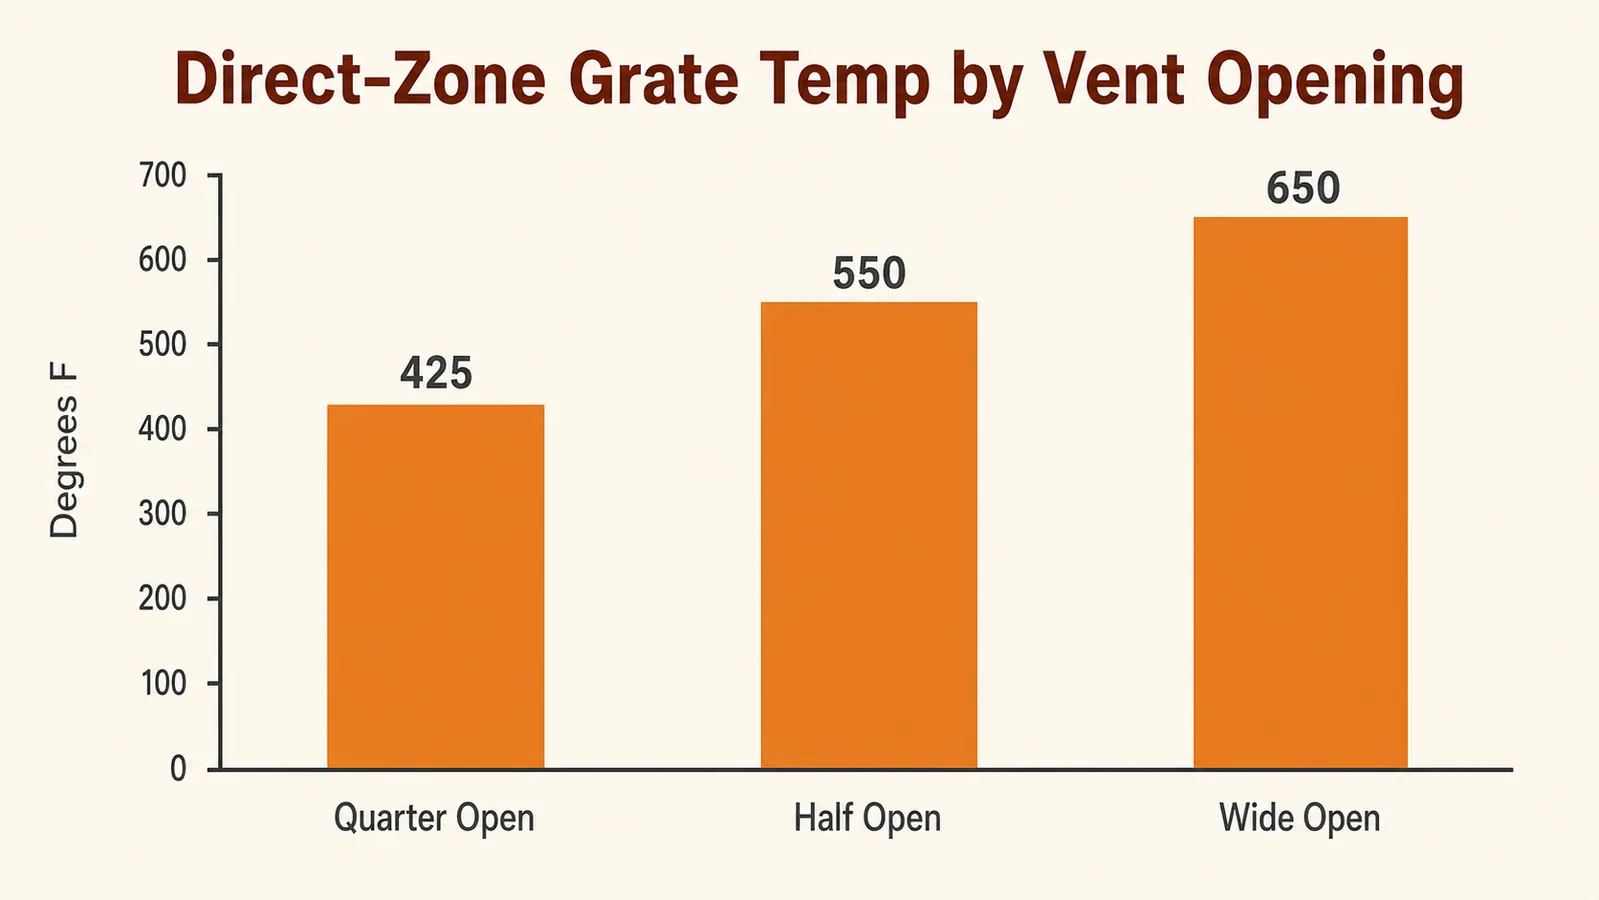
For a hard sear I run both vents wide open the whole time, which on my Weber pushes the grate temperature directly over the coals up to around 650 degrees at this altitude. If your vents are cracked to about a quarter open instead, you're closer to 425 degrees, fine for a slower cook but too gentle for a real crust. Half open lands around 550, which works for a thick chop that needs a little more time to come up to temperature without scorching. For steaks under an inch and a half thick, I want the top end, vents wide open, the whole time the meat is over direct heat.
Lay the meat directly over the mound of coals and leave the lid off entirely during the sear. A lid traps smoke and turns some of what you're doing into indirect cooking even over the hot zone, and for a sear you want radiant heat straight off the coals, not warm air circulating around the meat. Give it 90 seconds to two minutes per side for a steak an inch to an inch and a half thick, flipping once a real crust has formed rather than on a timer alone. You're looking for a deep brown, almost mahogany color with some char at the edges, not grey.
Flare-ups happen fast over a mound this hot, especially once fat starts rendering off the meat. Keep a spray bottle of water nearby and hit any flame that climbs more than an inch or two above the grate. Out here the afternoon wind picks up off the mesa most days, and a gust can fan a small flare-up into something that scorches the crust black instead of browning it, so I try to sear earlier in the day or turn the kettle so the wind isn't blowing straight up into the open lid. A cheap ribbon tied to the cart tells me which way it's actually blowing before I even light the chimney.
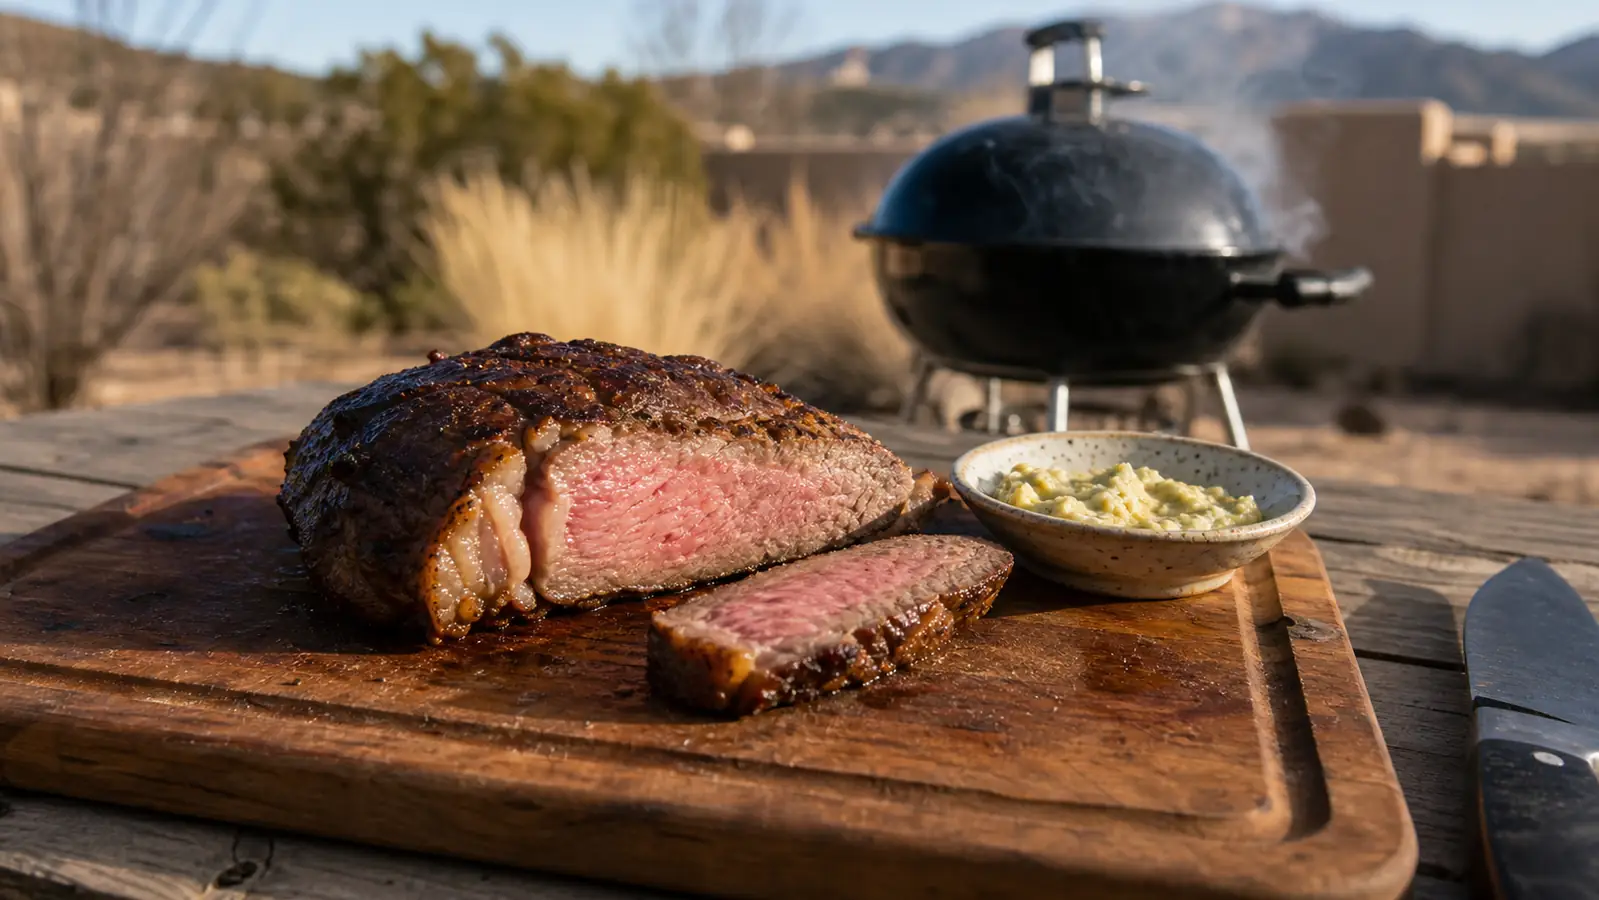
Step 5: Move It to the Cool Side to Finish and Rest
Once you've got a hard crust on both sides, move the meat to the empty half of the grate, the cool zone you left open back in Step 1. Put the lid back on with the top vent cracked and let it finish coming up to temperature indirectly instead of continuing to blast it over direct heat. For a 1.5-inch ribeye I'm usually pulling it off the cool side around 130 degrees internal for medium-rare, since it'll climb another five degrees or so while it rests. Carryover runs a touch shorter here than it did when I used to grill at sea level, since our thinner air pulls heat off the surface a bit faster once the meat is off the fire.
Let it rest for at least 5 minutes on a cutting board before you cut into it, longer for a thicker cut like a tomahawk or a bone-in pork chop. Cutting in early lets all the juice you just worked to keep in run straight out onto the board instead of staying in the meat. I've timed this enough times to know the wait is worth it every single time, even when everyone standing around the grill is hungry and telling me to just cut it already.
What Else Helps
A few things outside the five steps make this easier to repeat cook after cook. I keep a cheap oven thermometer resting right on the cooking grate over the direct side the first few times I dial in a new setup, just to see what my vent settings actually translate to in real grate temperature instead of guessing at it. A wire brush with stiff bristles matters more than people think, since a soft, worn-out brush just polishes old grease into the metal instead of lifting it off, and that leftover residue is what tears a crust apart on the flip.
If I'm searing for a crowd, I finish a few of the steaks with a pat of green chile butter right off the grate, which melts into the crust in the few seconds before I plate it. And if the coals are already spent from a shorter first cook, I've had good luck adding a small handful of fresh unlit briquettes directly onto the still-hot mound rather than lighting a whole second chimney for just one or two more steaks. They catch fast enough off the existing coals at this altitude that I'm rarely waiting more than a few minutes.
I also dump the ash catcher before every searing session, not after. A bottom vent packed with old ash restricts airflow right when you need the fire pulling hardest, and I've had a mound run 50 degrees cooler than expected simply because I skipped that five second step. Once a season I pull the grates off entirely and check them for warping too, since a grate that's gone slightly bowed from years of high heat won't sit flat against a steak the way a true one will, and that uneven contact is an easy thing to miss until you notice one side of every sear looks lighter than the other.
A hard sear isn't about how hot your fire is. It's about whether you built somewhere cooler to go once it's done its job.
Ready to Build a Fire That Actually Sears?
This whole method starts with a kettle that holds heat and holds a vent setting predictably. I've run it on the same Weber Original Kettle, 22-Inch, for twelve seasons at altitude. Check today's price on Amazon before your next cookout.
Amazon Check Today's Price on Amazon →